William Butler Yeats was an Irish poet who was born in 1865 and died in 1939. While learning art as a child, he turned into a poet and wrote plays while running a theater. He was also interested in politics and participated in the Irish independence movement. In 1923, he became the first Irish writer to receive the Nobel Prize in Literature. His poetry changed from feminine in the beginning to masculine and metallic in the later.
This poem, which I transcribed this time, is thought to be a reverse story of the poet's own life.
The coming of wisdom with time
By William Butler Yeats
Though leaves are many, the root is one;
Through all the lying days of my youth
I swayed my leaves and flowers in the sun;
Now I may wither into the truth.
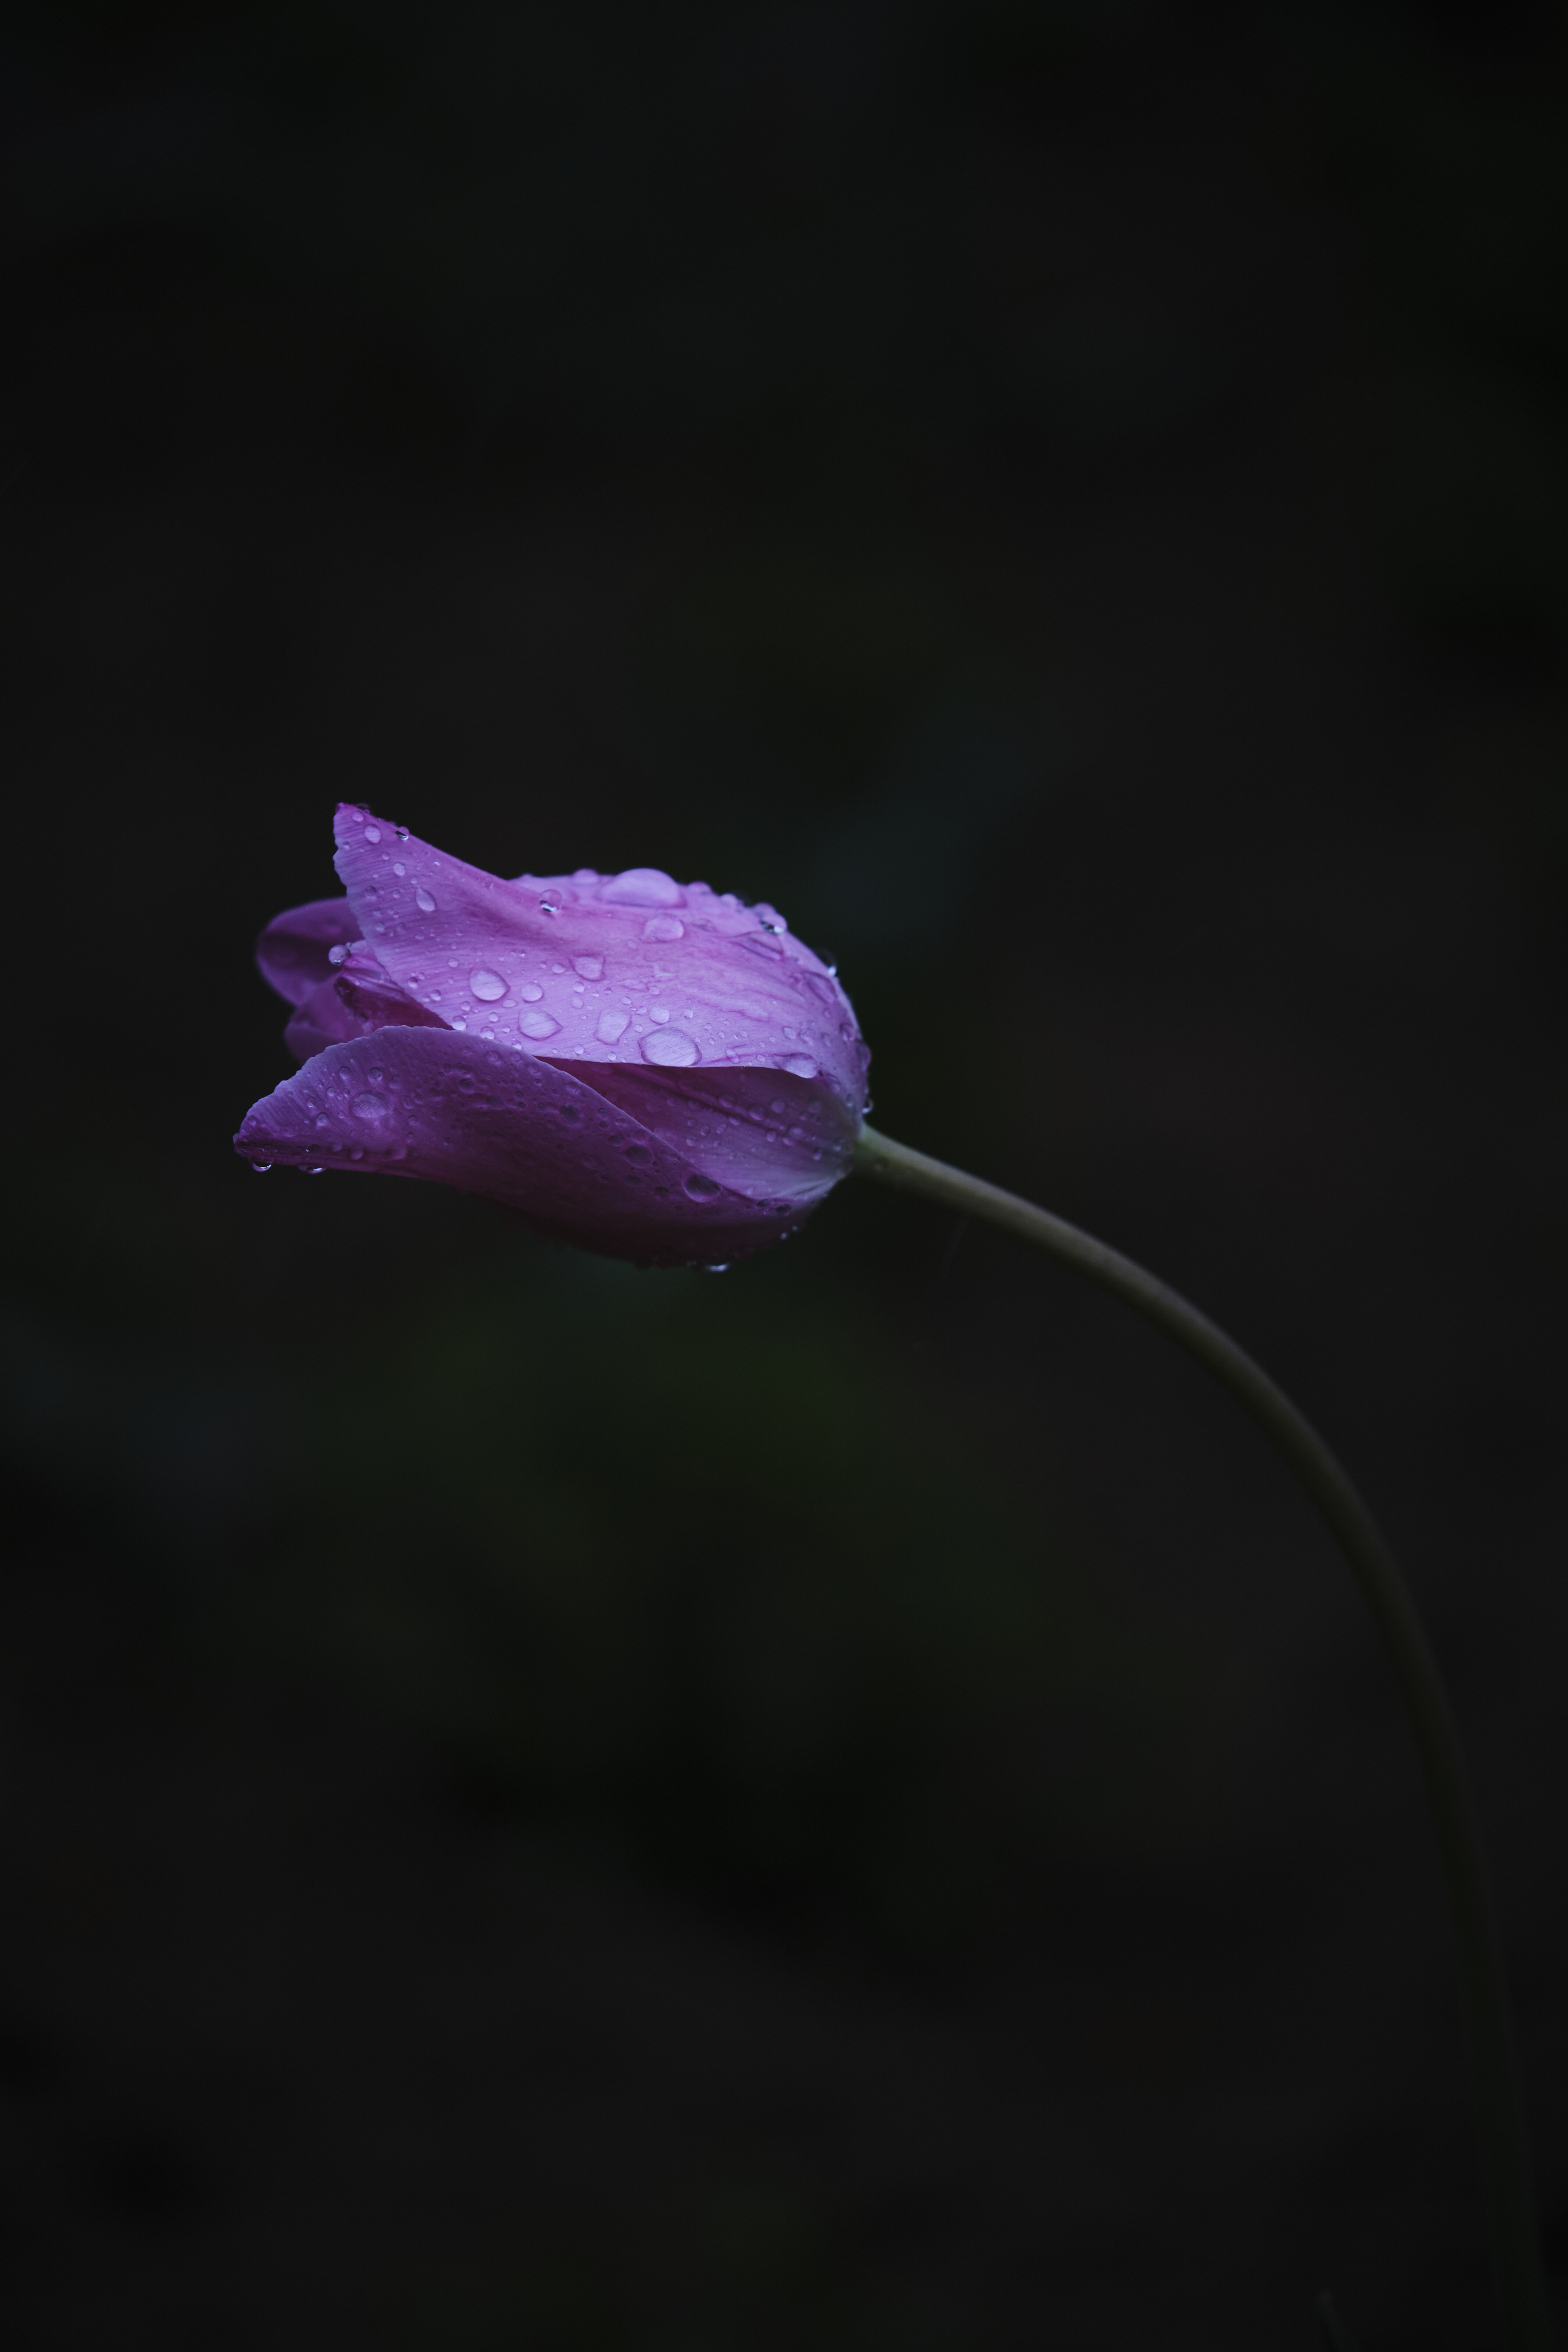
The pen I used for this poem's transcription is Tombow's Playcolor 2.It was kind of hard to find a picture that goes well with this poem.
 |
| Color Scan |
 |
| b&w Scan |
This photo was taken at Jangja Lake Park in Guri, South Korea on March 23, 2024. Not long after the flowers bloomed, I saw a lot of bees.
Fujifilm X-T4 F4 1/4000s ISO640
Carl Zeiss Flektogon 35mm f2.8
The picture above was edited in the way of Experiment 09, and the original picture is below.
 |
| Color |
 |
| b&w |
https://idea0404.blogspot.com/2024/02/experiment09-scan-with-waterdrops.html
Experiment23 description
1. First, Need a slightly broken printer 🙃
2. Print out color & bnw picture
3. Check the scan results and work again
 |
| Scan results B&W |
 |
| Scan results Color |
The reason why Experiment23 was created is as follows. This started when the printer at my home suddenly broke down and the blue color wasn't output properly, causing the printouts to have strange colors or stripes.
Even now that I think about it, I was very surprised when I saw the printer's results. I was wondering whether I should repair or replace the printer, but when I looked at the print results again, the idea of making this a work method occurred to me.
It's already been over a year since the printer slightly broke down, but it hasn't been fixed yet and I'm still using it well. 😂🤣
I strangely liked the results coming from this broken printer. Sometimes it shows a dreamy atmosphere, and sometimes it creates photos that have a sharp feel. And sometimes I am surprised because the colors are very different from the original. 🧐
Now let me show you the original photo.
If you compare the scanned copy with the original digital photo, the print appears to have lighter colors. Sometimes those printers produce very different colors. I will talk about that again next time.
Fujifilm X-T4 F7.1 1/1400s ISO160 80mm
XF80mm F2.8 R LM OIS WR Macro
* Experiment23 Other articles applied
https://idea0404.blogspot.com/2024/05/transcribing-my-weather-by-jane.html
Experiment22 description
1. Print out color & bnw picture
2. Put the scan picture on top of the scanner and put the mirror behind the picture
3. Scan without closing the scanner lid
4. Make sure the results are correct
/ Scan Results
The picture above is one that often appears and mentions on my blog, because it's affectionate, and it's even more so because it's a picture that I won in a photo contest.
In the last explanation, the color photo was not mentioned, so I added a color photo this time.
Now, I'm going to show you the original color and the black-and-white photo.
I mentioned the process or date of taking this photo last time,
so I'll replace it with the link below.
I love this editing method, and I work with it frequently. And I've been working with it this way, and I was even more excited to win the photo contest, as I introduced you last time. Here's another link to the previous article.
https://idea0404.blogspot.com/2024/03/analogsparks-2023-hm-fine-art.html
I submitted this photo not only to the last AnalogSparks2023 contest, but also to other contests, and I'm waiting for the results. I'll have to wait and see what the results will be.
Experiment22 Work is very similar to Experiment21 Work. Sometimes it's hard for me to tell just by looking at the results. When I place a mirror on the back of the picture and scan it, the scanner's light is reflected by the mirror behind the picture and comes out more clearly. This work has the effect of highlighting the subject a little more. 🙏
Experiment21 description
1. Print out color & bnw picture
2. Look at the composition of the picture and think about whether to choose a gem or express it in a circle
3. Put the picture on the scanner, place the jewelry, or put the water bottle behind the picture
4. Open the top panel of the scanner and scan it
/ Scan Results


If you look at the results, it may seem a little unfamiliar, but I would appreciate it if you could see it as an effort to highlight the topic.
This photo was taken on Saturday, July 1, 2023. It was such a hot summer day that I got this photo at Yulgok Park in Paju, sweating profusely.
Fujifilm X-T4 F7.1 1/210s ISO160 451mm
XF150-600mm F5.6~8 R LM OIS WR
First of all, I'll show you the original version of this photo.
The wildflower managed to maintain its beautiful water form even on very hot summer days. Another flower is looming over the back, which makes it look rather mysterious.
I'm a little disappointed that I can't see the faint flowers on the back in the 21st edition of the experiment.
Experiment 21 aims to highlight the subject more prominently while scanning the photo so that it can be viewed intensively. It is somewhat different from the original because the surroundings or background cannot be seen well.
Experiment20 description
1. First, place a mirror on the back of a flower or object and take a picture so that the back can be seen
2. Print out color & bnw picture
3. When scanning two pictures, place the mirror in the middle or against the other side
4. Check the scan results and work again
 |
Scan results
|
This picture is a picture of a color and a black-and-white photo folded in a circle and scanned with a mirror in the middle. It looks a bit like a collage, it looks like an abstraction.
The original work placed a mirror on the back of an actual flower and photographed the front and back of the flower together. This project started with an attempt to show the front and back together in a photo. If I have a chance, I will upload a picture of the original work next time.
I will show you the original photo for the photo above.
This photo was taken on Sep. 9, 2023, at an indoor butterfly garden in Seoul Forest Park, South Korea. This butterfly garden was nice to see a lot of butterflies that were quite big and had colorful wings.
You can also see beautiful butterflies in the picture above, and you can see that the size of the butterflies is quite large compared to the size of the flowers.
Fujifilm X-T4 F9 ISO1000 340mm
XF150-600mm F5.6-8 R LM OIS WR
Experiment19 description
1. Print out color & bnw picture
2. put the color picture on top of the black and white picture
3. I'm going to rip the picture that's on top
4. Scan with scanner while posting the torn picture
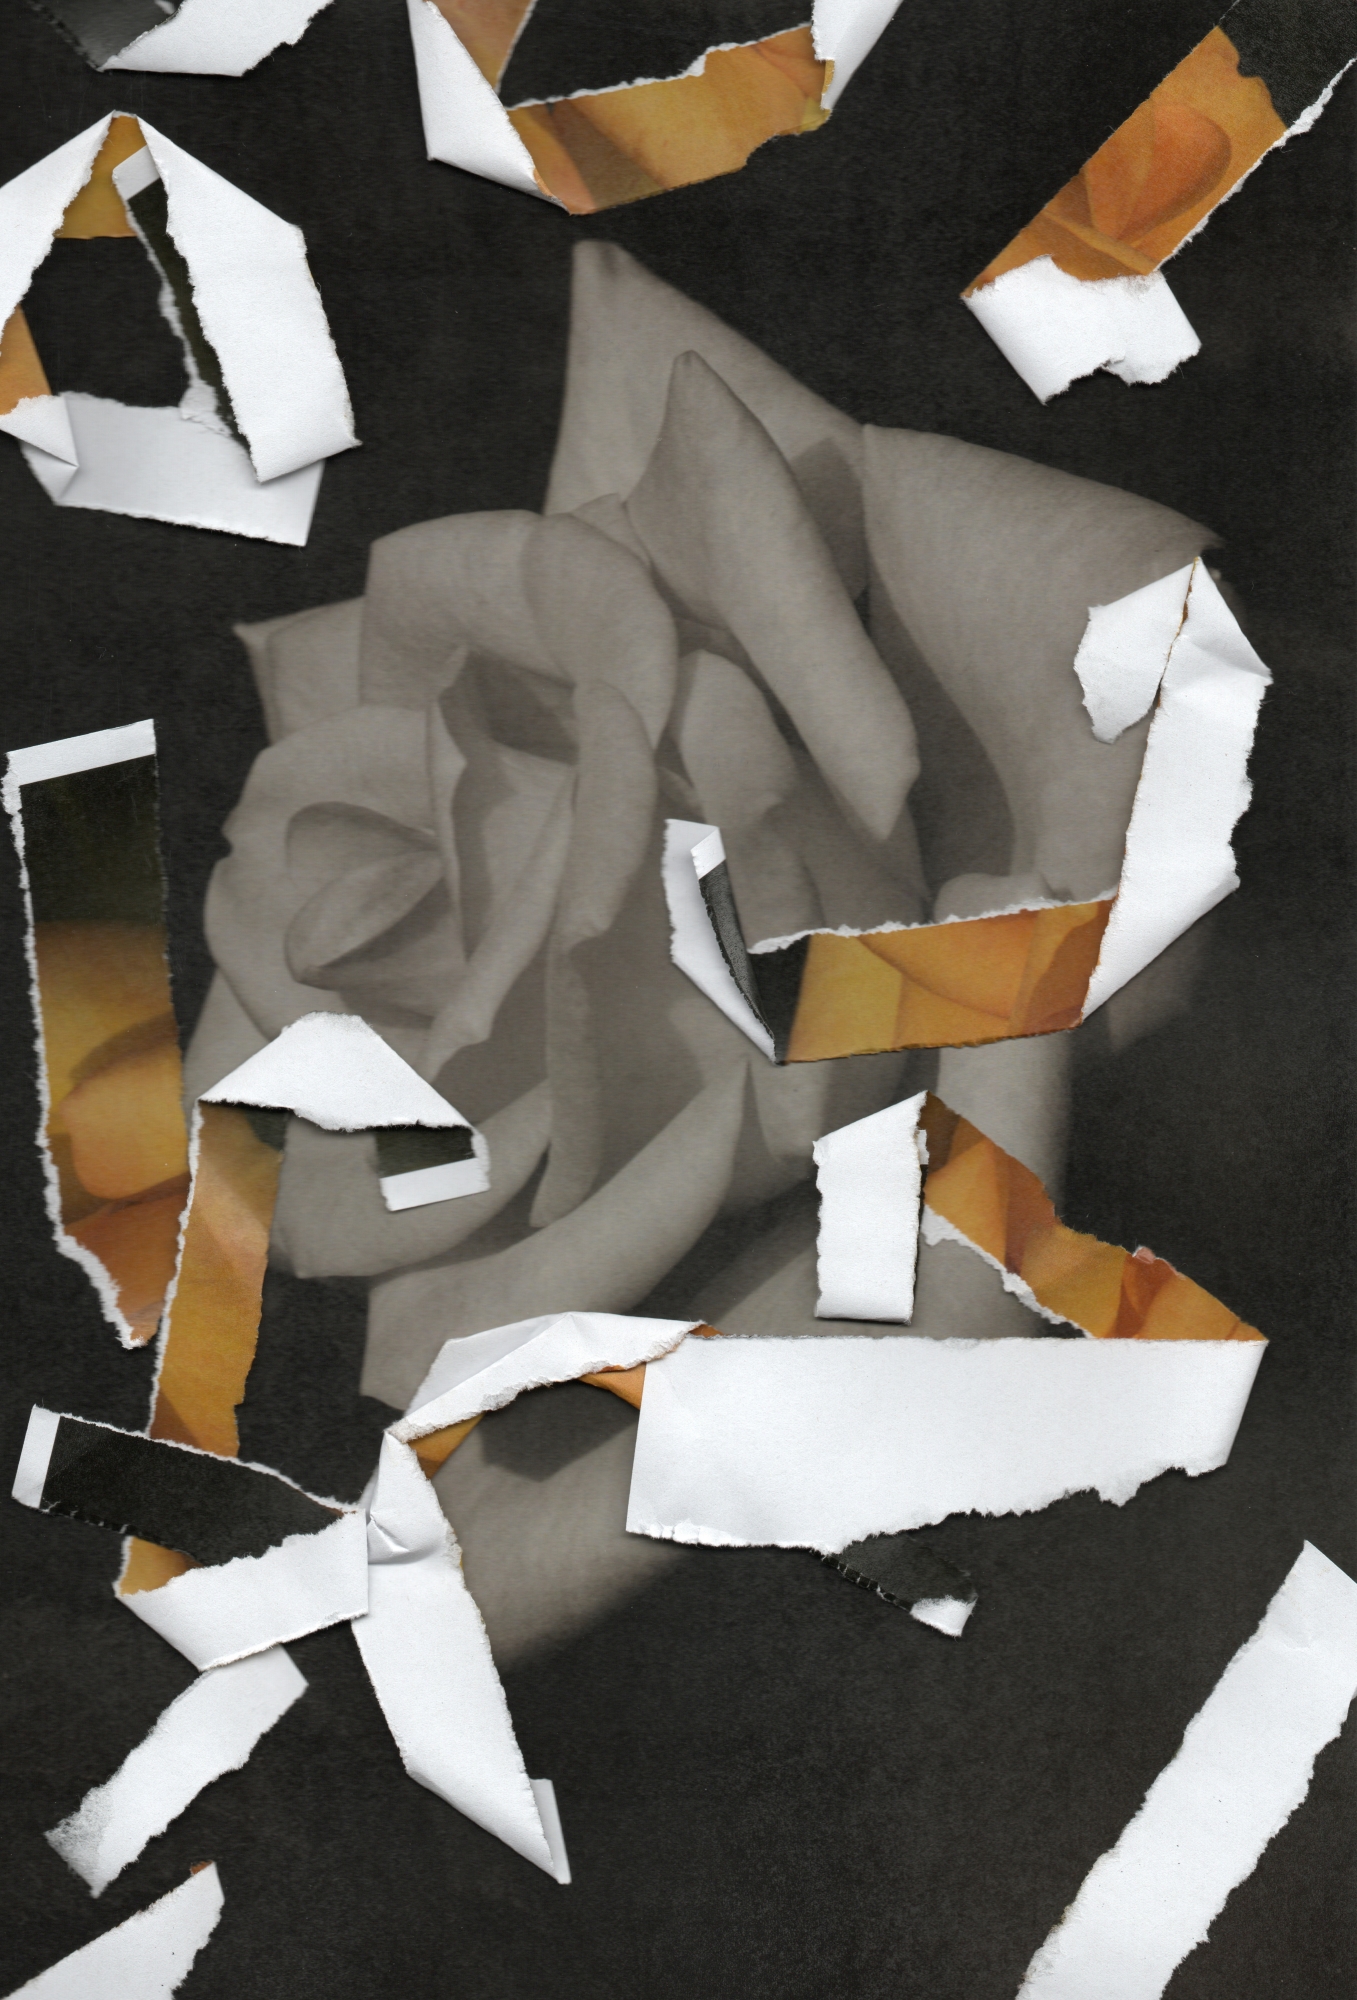
If you look at the scan, it may look a little complicated and quite messy. You might feel like you're looking at a kind of complex, dizzy arrangement of cells. I started working on this with considerable intention.
/ Scan Results
The results of the scan are as follows. The picture above shows the scanner's lid tightly closed and pressed to scan, making the color photographs look flat. In the picture below, I scanned the broken color photographs by slightly lifting the lid of the scanner to make them look more three-dimensional.In my personal opinion, I prefer the second one. 😅
Next, I will show you the original photos of the pictures above.
If you look at these original photos, you might ask, "Why do you have to edit it like that?"
I wanted to show in this one picture the complicated and detailed process of sprouting from seeds and becoming a single flower rather than wind or raindrops in the atmosphere of this static photo.
This picture was taken on May 20, 2023. Roses are the most beautiful May.
Fujifilm X-T4 F9 1/340s 406mm
XF150-600 F5.6-8 R LM OIS WR


%202024.03.01.JPG)


